Transforming a Manufacturing Facility’s Floor with Polished Concrete in Salem, Oregon
Boise Cascade, a prominent client in Salem, Oregon, sought to rejuvenate their 150,000 sq. ft. manufacturing facility with polished concrete. With a 9,000 sq. ft. area in need of attention, they enlisted the expertise of Parker Smith, a polished concrete contractor from Smith and Company Painting in McMinnville (503-472-8100). The challenging project involved transforming a 30-year-old, heavily used floor with numerous patches and failing epoxy coating into a beautiful, easy-to-maintain surface.
Concrete Polishing Project Highlights:
- Location: Salem, Oregon
- Client: Boise Cascade
- Facility Type: Manufacturing facility
- Concrete Polishing Contractor: Parker Smith, Smith and Company Painting, McMinnville, Oregon (503-472-8100)
- Building Size: 150,000 sq. ft.
- Project Scope: Polish 9,000 sq. ft. of concrete flooring
- Timeline: Three weekends (Friday, Saturday, Sunday)
About The Polished Concrete Project
The manufacturing facility’s floor had seen better days. Constant heavy forklift traffic and multiple epoxy coatings had taken their toll on the 30-year-old concrete surface. Parker Smith and his team devised a plan to complete the project in three 3,000 sq. ft. sections, each tackled over a weekend, for a total of three weekends.
The polishing process began with 16 grit diamonds to remove the old epoxy coating. Gradually, the team worked their way up to an 800 grit polish, resulting in a stunning finish. During the polishing, a densifier and a couple of coats of penetrating sealer were applied to the slab to ensure durability and protection.
Boise Cascade was extremely satisfied with the results. The peeling epoxy was no longer an issue, and the polished concrete floor not only looked fantastic but was also easy to clean. Smith and Company Painting also developed a maintenance plan for the client, ensuring the floor would remain in pristine condition for years to come.
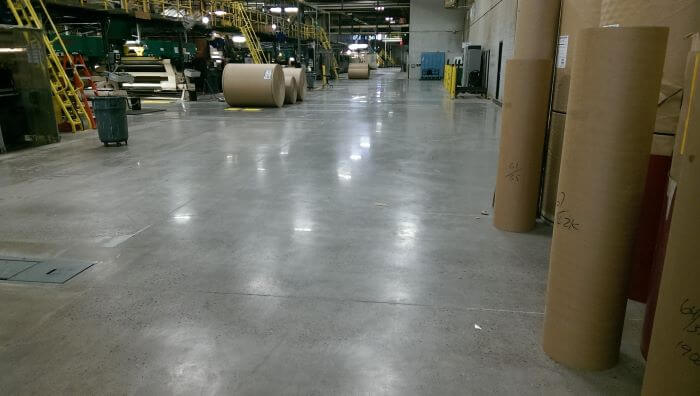
Polished Concrete By Smith and Company Painting of McMinnville Oregon
This Salem, Oregon manufacturing facility experienced a remarkable transformation thanks to the polished concrete expertise of Parker Smith and his team at Smith and Company Painting. The once worn-out and patchy floor was converted into a gleaming, low-maintenance surface that the client was proud to showcase. The project’s success demonstrates the potential of polished concrete as a practical and visually appealing flooring solution in industrial environments.


